
2025 Update
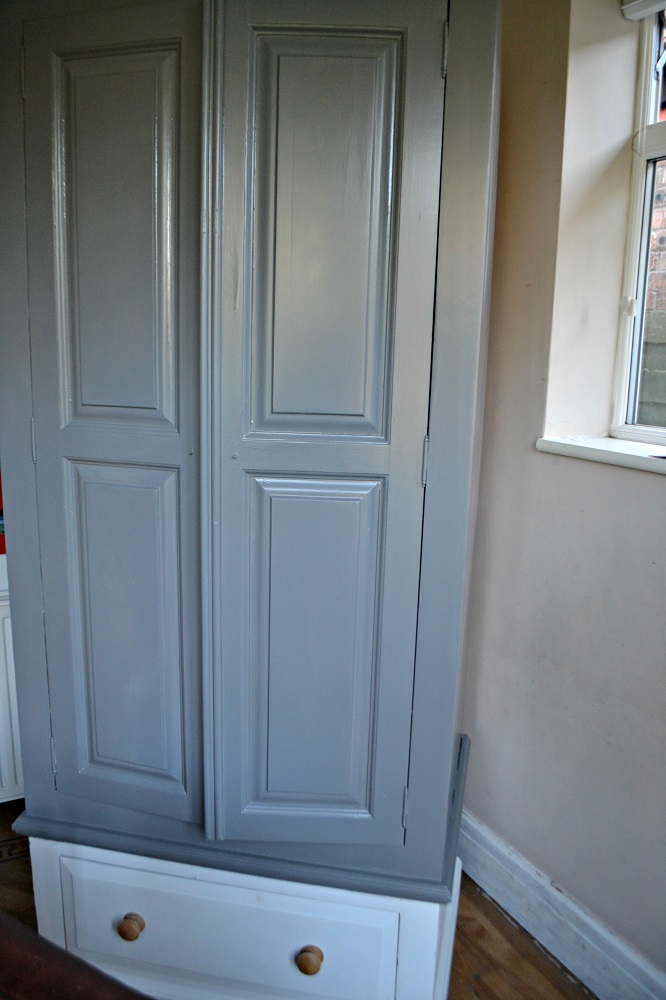
A few years ago, I transformed a solid pine wardrobe using a single coat of cupboard paint – an inexpensive, quick way to modernise dated wooden furniture. We later sold the wardrobe when redecorating and it sold quickly, which just shows how much value a simple paint update can add to solid pine pieces.
If you’ve got a wardrobe that’s seen better days, this method still works beautifully. Here’s exactly how I did it, what I used and the tips I’d recommend if you’re tackling something similar.
Why I Updated This Pine Wardrobe
A friend of mine was helping a local family declutter and came across this wardrobe. Knowing I love a good furniture project, she sent me a photo – and I couldn’t resist.
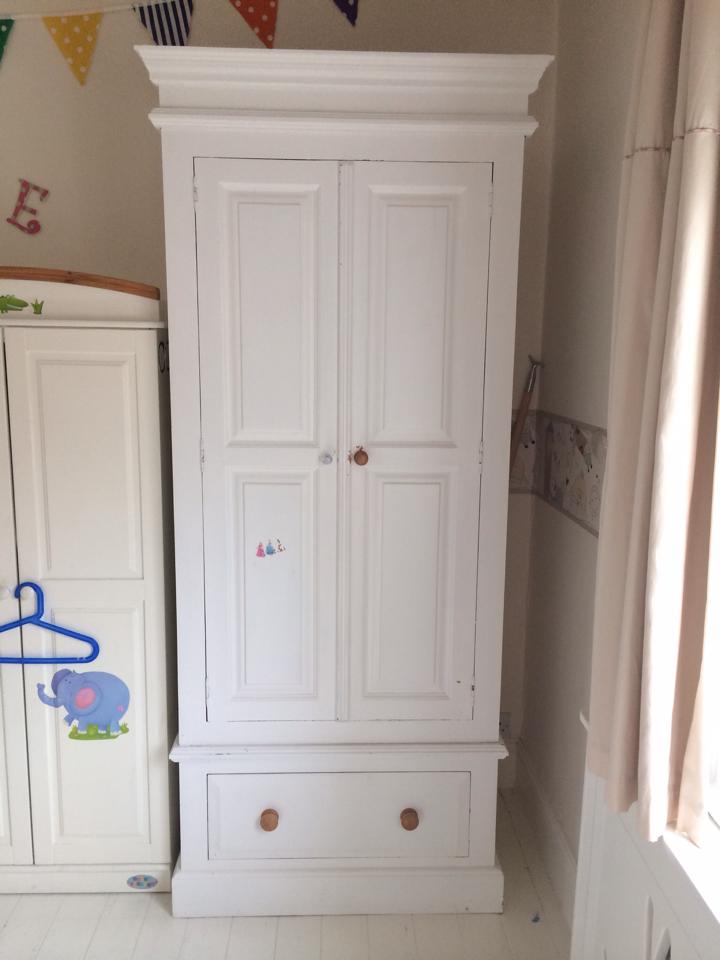
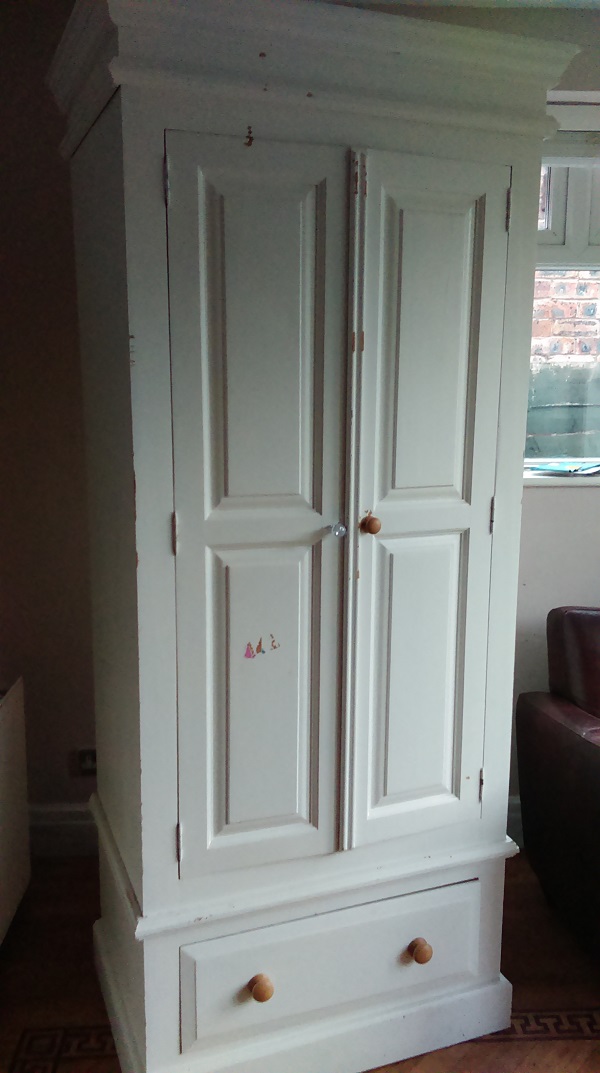
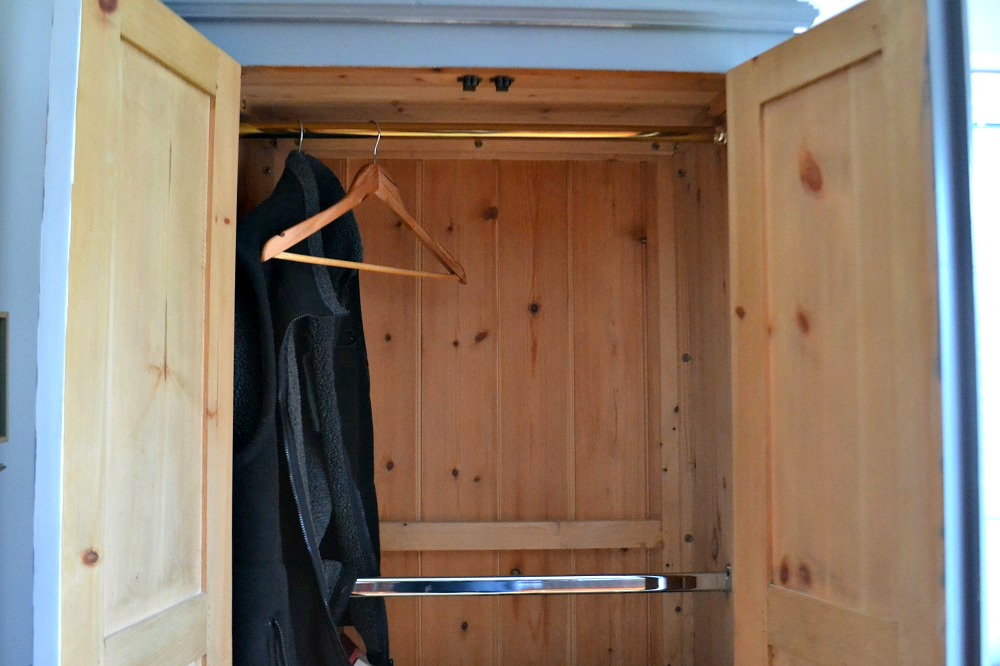
It was handmade solid pine, full of potential, and even better, it separated into three parts so we could fit it into the car. My original plan was to convert it into a pantry-style cupboard for the kitchen with shelves and storage inside (I love a bespoke larder!), but once we brought it home, the proportions were just too large for our space.
Even though we couldn’t keep it, I still wanted to give it a makeover before passing it on to a new home.
What I Used
-
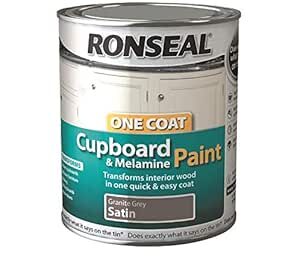
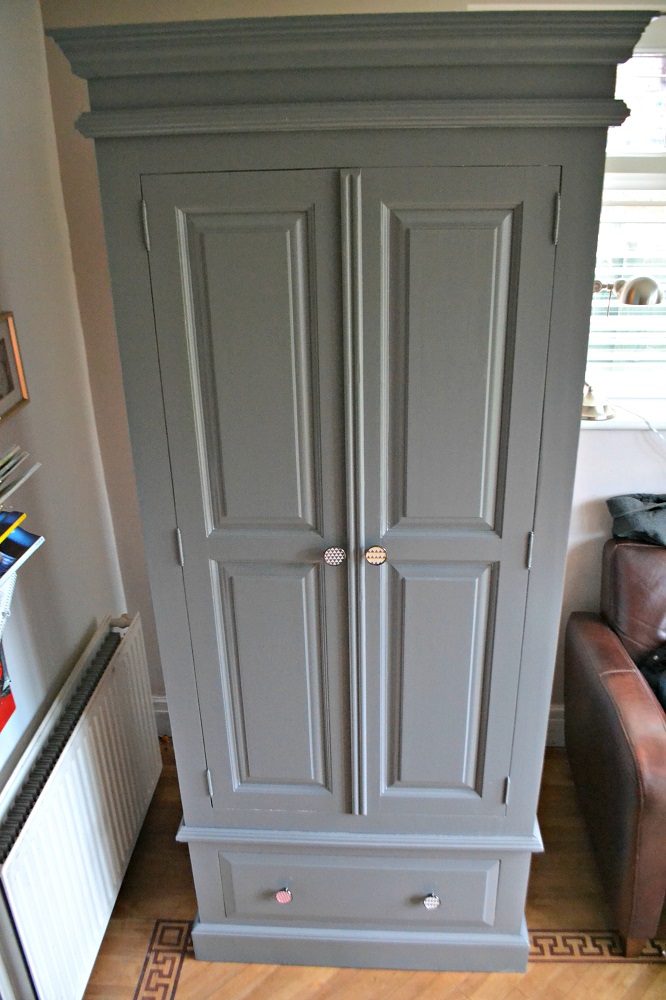
Ronseal One Coat Cupboard Paint – Cobalt Grey (Satin)
-
Sandpaper (medium grit)
-
White spirit or sugar soap
-
Synthetic bristle brush
-
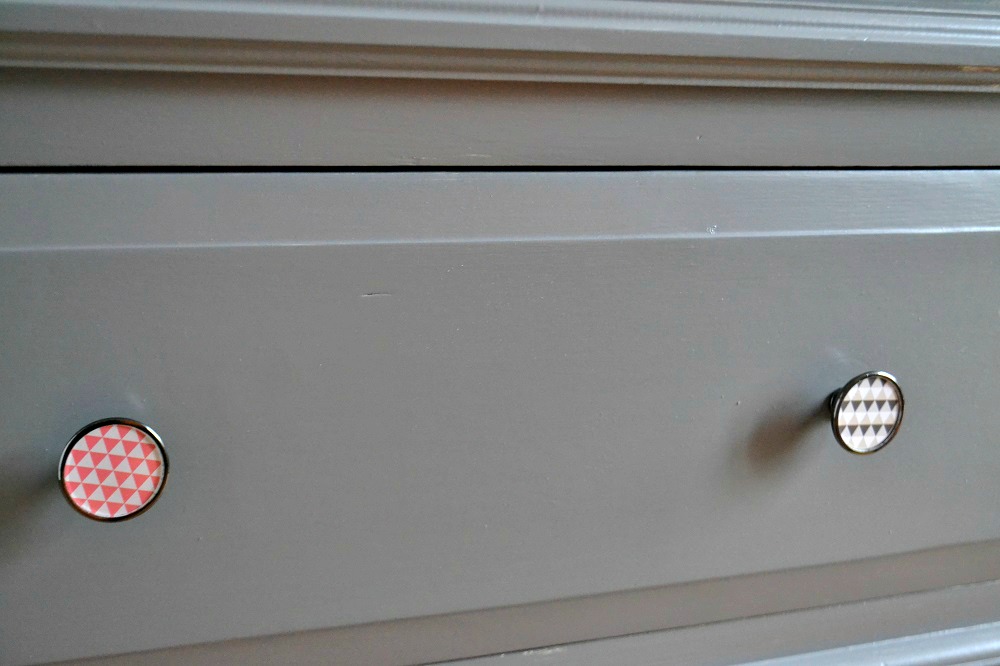
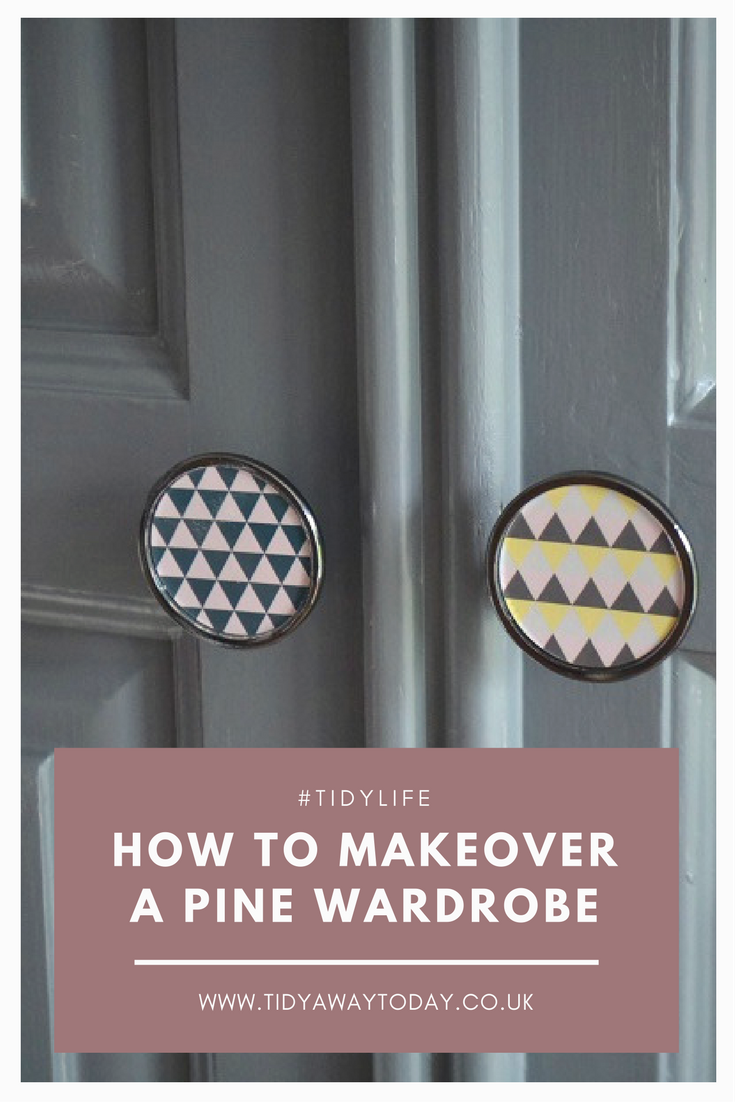
New handles / knobs (mine were geometric designs from Pushka Home)
-
Drop cloth / dust sheet
Tip: Cupboard paint is designed for high-traffic surfaces like kitchen cabinets, so it gives a tougher, smoother finish than chalk paint and is great for wardrobes.
How to Paint a Pine Wardrobe (Step-by-Step)
1. Prep & Light Sanding
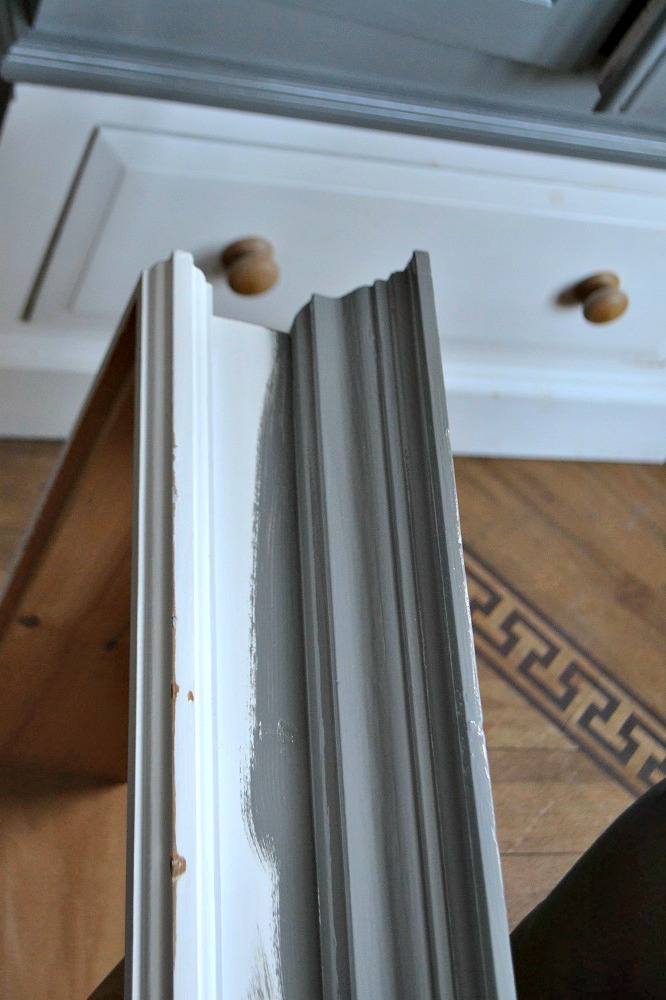
I lightly sanded the wardrobe all over by hand – just enough to key the surface and help the paint grip. No heavy sanding required.
2. Clean the Surface
After sanding, I wiped the piece down with white spirit to remove dust, grease and residue. Sugar soap also works well for this step.
3. Apply One Coat of Paint
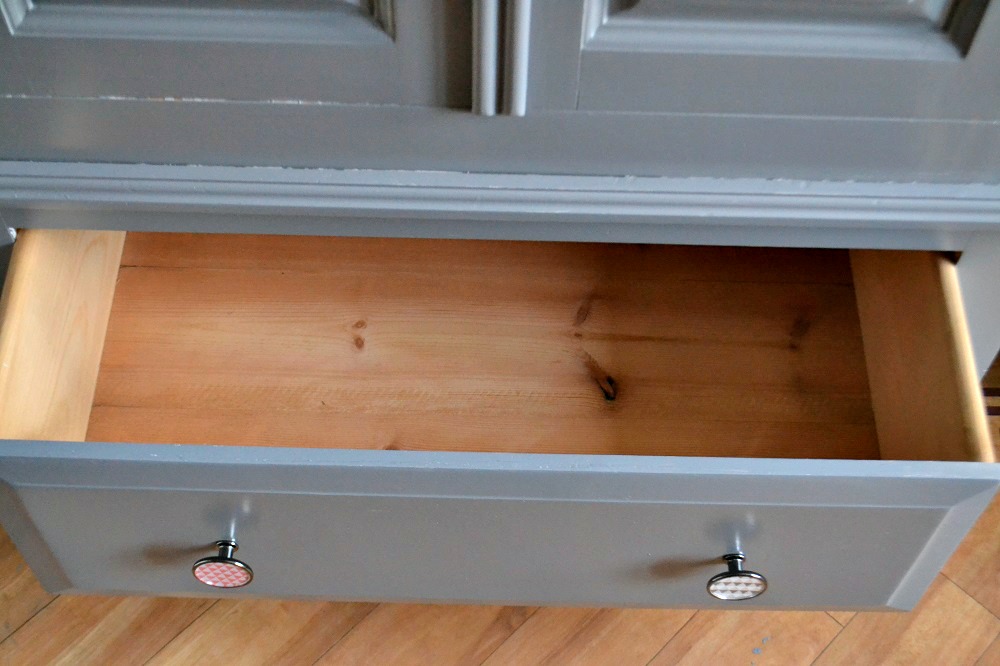
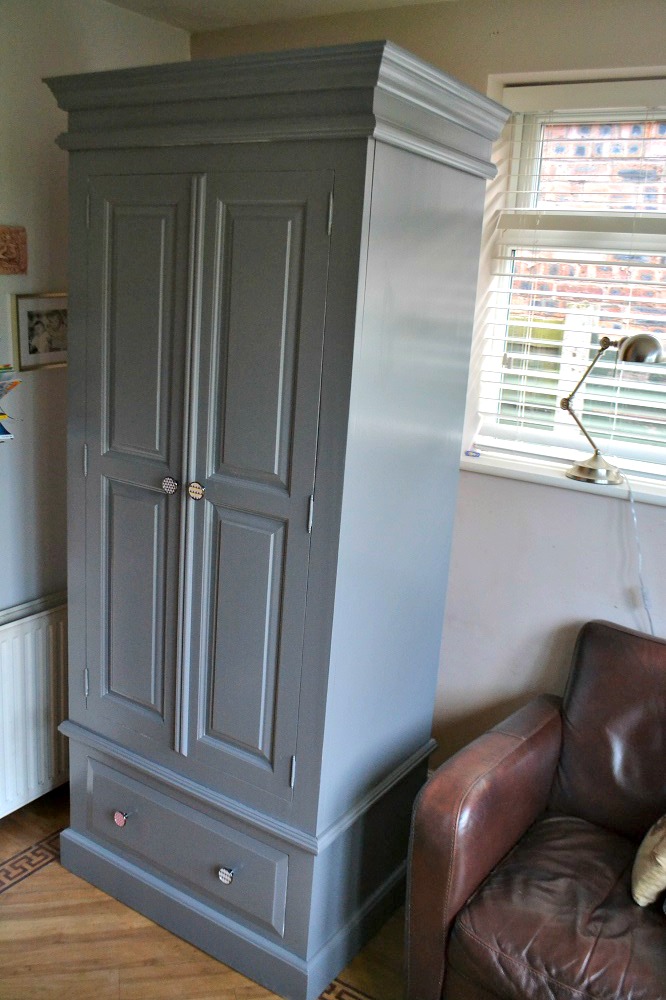
I used Ronseal One Coat Cupboard Paint in Cobalt Grey (Satin).
Why it worked well:
-
Dries in around two hours
-
Leaves a smooth, almost factory-style finish
-
No obvious brush strokes
-
Hard-wearing once cured
I applied one careful coat and just watched out for drips along the edges.
4. Replace the Handles
The old knobs were dated, so I swapped them for contemporary geometric ones from Pushka Home. I mixed designs for a more playful finish against the grey.
This small detail completely transformed the overall look.
How the Finish Holds Up
Although we didn’t keep the wardrobe long term, the finish:
-
Dried smooth and silky
-
Didn’t chip easily
-
Looked far more modern and high-end
When we eventually sold it, the painted finish definitely helped it appeal to buyers – proof that a simple DIY update can add value.
Tips for Updating Pine Furniture
-
Lightly sand first for better adhesion
-
Prime knotty pine if you want to avoid bleed-through
-
Use synthetic brushes for smooth finishes
-
Remove doors to paint flat if you can
-
Upgrading handles is an instant moderniser
This method works just as well on pine chests of drawers, sideboards and bedside tables.
FAQs
Do you need primer for pine furniture?
If the pine is varnished and in good condition, a light sand may be enough. For knotty pine or heavy staining, use a primer or stain block first.
Can I paint pine without sanding?
You can, but sanding helps prevent peeling and gives a longer-lasting finish.
What’s the best paint for pine wardrobes?
Cupboard/cabinet paints give a harder finish than chalk paint and are more durable in bedrooms and hallways.
Can I do this with chalk paint instead?
Yes, but you may need a topcoat or wax to protect it.
More DIY Furniture Posts You May Like
Pin This for Later
Are you thinking of giving a tired piece of furniture a new lease of life? It’s such a satisfying project – and much cheaper than buying new. Let me know if you try something similar!

you have got my mind racing with ideas, we are struggling with storage in our kitchen so making a wardrobe into a pantry/larder is a fab idea!
Jaime Oliver recently posted…Review & Giveaway: OXO Measuring Spoons & Cup Bundle
Hi there! Oh I’m so glad it has given you some ideas – you may also like my creative storage board on Pinterest 🙂 https://www.pinterest.com/tidyawaytoday/creative-storage/
Antonia xx
Love this proect, the colour and finish is really nice.
Jenni recently posted…2014 in review
Thanks Jenni! I appreciate you stopping by and your comment 🙂 xx
I love it, the colour and knobs are great.
Anne recently posted…Bathroom Out of this World
Thank you, Anne, nice to have your feedback 🙂
Love this makeover! That colour is great….and I adore those knobs!! Shame you didnt turn it into a larder, that would’ve been amazing….but I understand why!! Great post!!
june olsen recently posted…DIY textured wall hanging
Thanks June! Yes it is a shame, maybe I’ll discover a smaller piece of furniture that fits our home a bit better, fingers crossed xx
That is beautiful, I love the final and colour to it. I do have a plain wood large dresser that needs a paint job but its such a large piece of furniture. Seeing what you are thinking of doing to yours and making it a larder is a great idea.
Stephanie recently posted…Project 365 – our 2015 in photos – Week 2
Hi Stephanie, ooh sounds like it could be an interesting project… let me know if you blog about it! Thanks for visiting xx
That’s a brilliant makeover project! I’ve never thought to transform an old wardrobe into a kitchen pantry – what a good idea! Off to check out your pinterest 🙂
Lia : Tangerine Canteen recently posted…HOME – JAN 2015
Those knobs are inspired!
Claire @ Style Arch recently posted…Hus & Hem
Wow. The results here are amazing!! I have a lovely old pine wardrobe from my teens. It is cavernous and fits most of me and my husband’s clothes inside. We’ve just bought a house and it fits perfectly in our room. BUT, it looks tired. I’d love to make it over with some new knobs and some deep charcoal paint (not sure if that shade will work – must head to Pinterest). Thanks for sharing this. It is gorgeous. Hope you got a good sale for it.
Fiona @ Free Range Chick recently posted…Last-Minute, Super-Easy Christmas Gift
Thank you for your comment, anything pine comes up a treat when painted – I say go for it! 🙂
This looks fantastic, I’ve keen to use this Ronseal Cobalt Grey for my kitchen cupboards but can’t find anywhere that sells the satin version (results are only for the gloss). Would be great if you could let me know where to buy : )
Beautiful work. I’m hoping to buy a ‘rustic’ retirement property in Portugal in the next year or so and your ideas are just what I’m looking for. As you may know, in central rural Portugal, the properties rarely come with ‘modern’ kitchen units etc. so I’d like ‘free-standing’ pantries and cabinets, re-purposing old pine wardrobes and drawers throughout.