Introduction
Your hallway is often the first impression visitors have of your home, so why not make it unforgettable? Creating a panelled wall with pre-cut strips of MDF is an easy and creative way to add charm and character to this often overlooked space. This step-by-step guide will walk you through the process of designing, installing, and styling a stunning panelled wall in your hallway. From the initial planning stages to the final touches of decoration, you’ll transform your hallway into a stylish and inviting area that reflects your personal taste.
Materials You’ll Need
- Pre-cut MDF strips (I ordered mine at cutmyplastic.co.uk)
- Adhesive suitable for MDF (construction adhesive or panel adhesive)
- Caulk and caulk gun
- Paint and primer
- Paintbrushes and rollers
- Sandpaper (for smoothing edges)
- Level and measuring tape
- Pencil
- Mirror & hanging hardware for the mirror shelf
- Radiator shelf
- Indoor plants and decorative pots
Step 1: Planning and Design
- Measure the height and width of your hallway wall and decide on the panel size and spacing. Common options include square, rectangular, or even more intricate designs. This is where I found the visualiser tool at Cut My Plastic so useful. All you need to do is enter the dimensions of the wall you’d like to panel. You can then adjust the number of rows, columns and width of the battens to suit your taste.
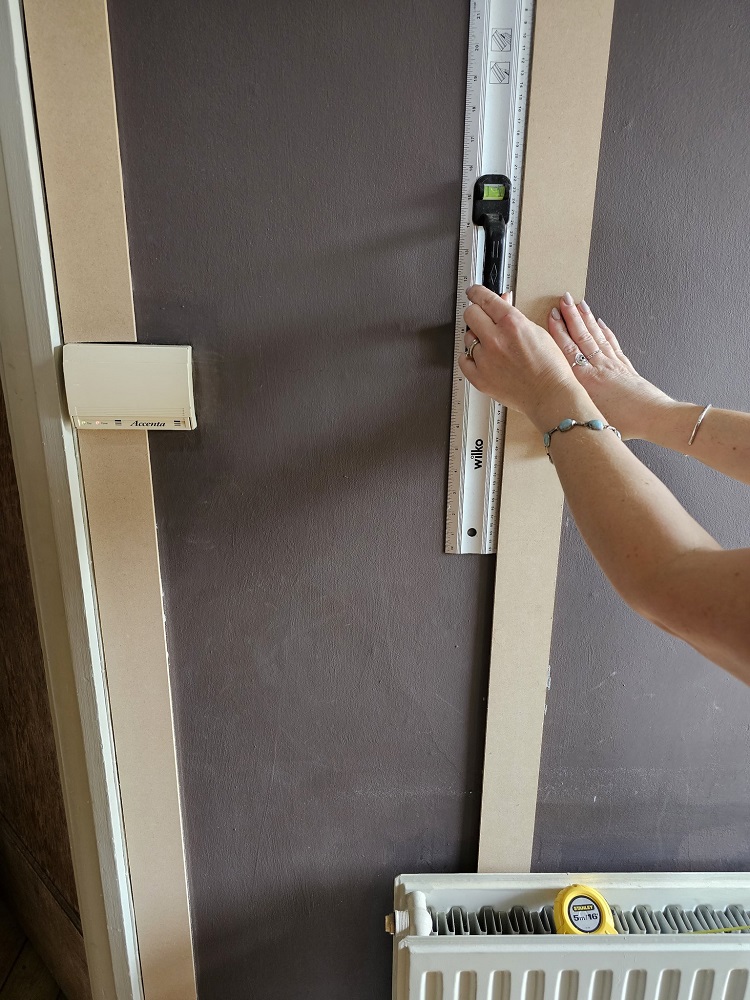
- Use a pencil and level to mark the areas where the panels will be placed. This ensures straight lines and a balanced look.
- Consider the visual flow of the panels. You can choose to have uniform gaps between panels or vary the spacing for a more dynamic effect.
Step 2: Installing the MDF Strips
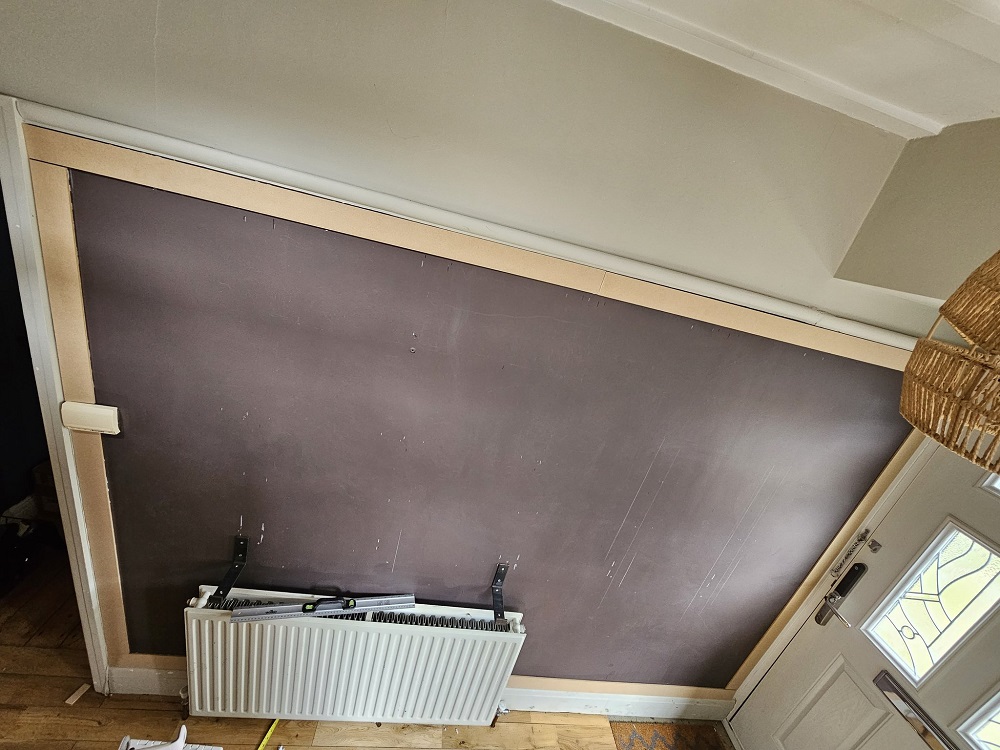
- I began by forming a frame on the wall with the MDF pieces. (Aesthetically you need a top, bottom and sides – the MDF verticals shouldn’t run directly between the picture rail and the skirting board.) I chose to create full length panels, but you could have a dividing line across the middle if you prefer square panels.
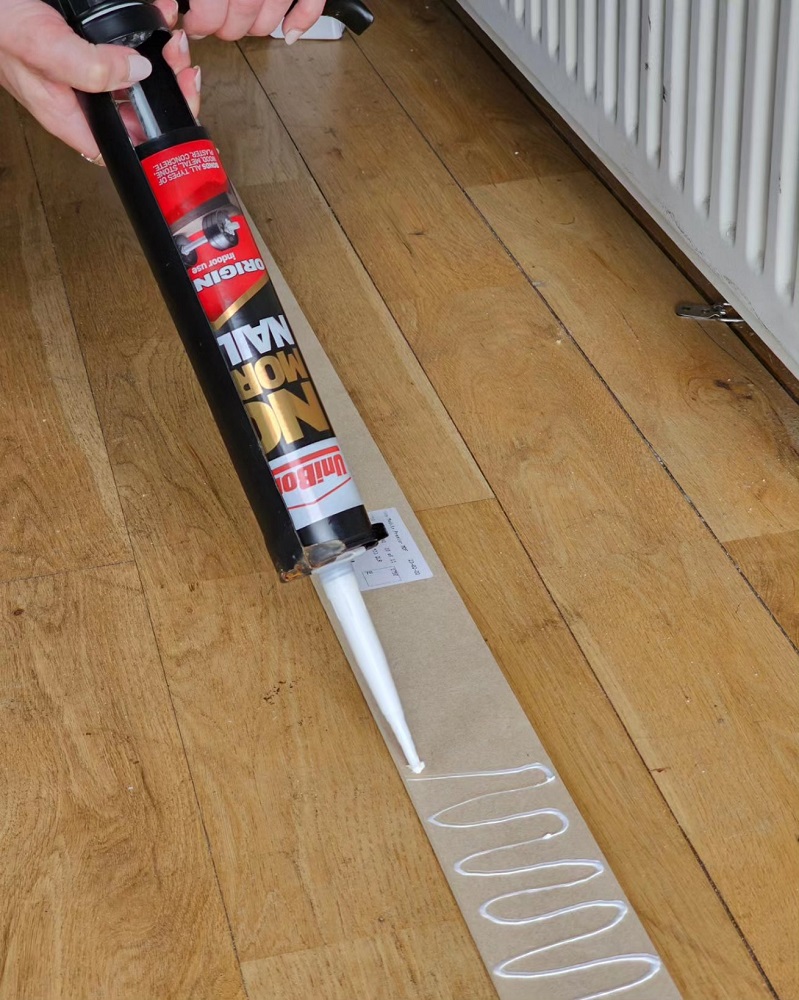
- Although pre-cut, you may need to trim some pieces with a handsaw due to the wall not being completely square like I did, and to fit the panelling around our alarm control box. Apply the adhesive onto the back of the MDF strips, ensuring even coverage.
- Press the MDF strips onto the marked areas of the wall, using your spirit level to ensure they’re straight.
- Hold each strip in place for a few seconds to let the adhesive bond properly.
- Continue this process until all the strips are installed.
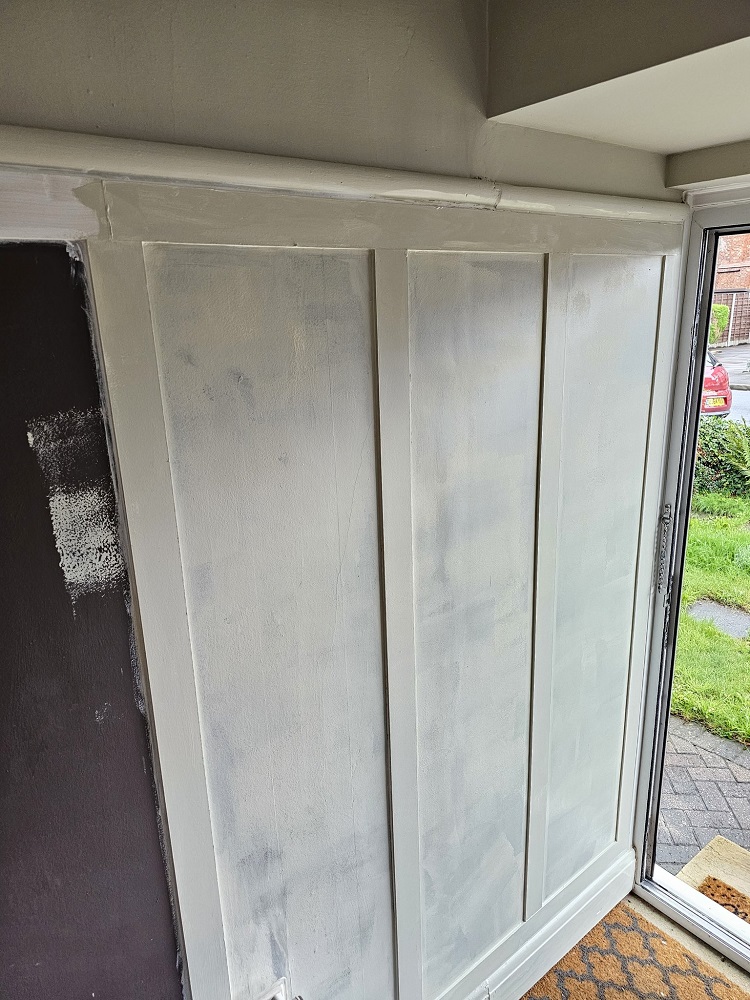
Step 3: Priming
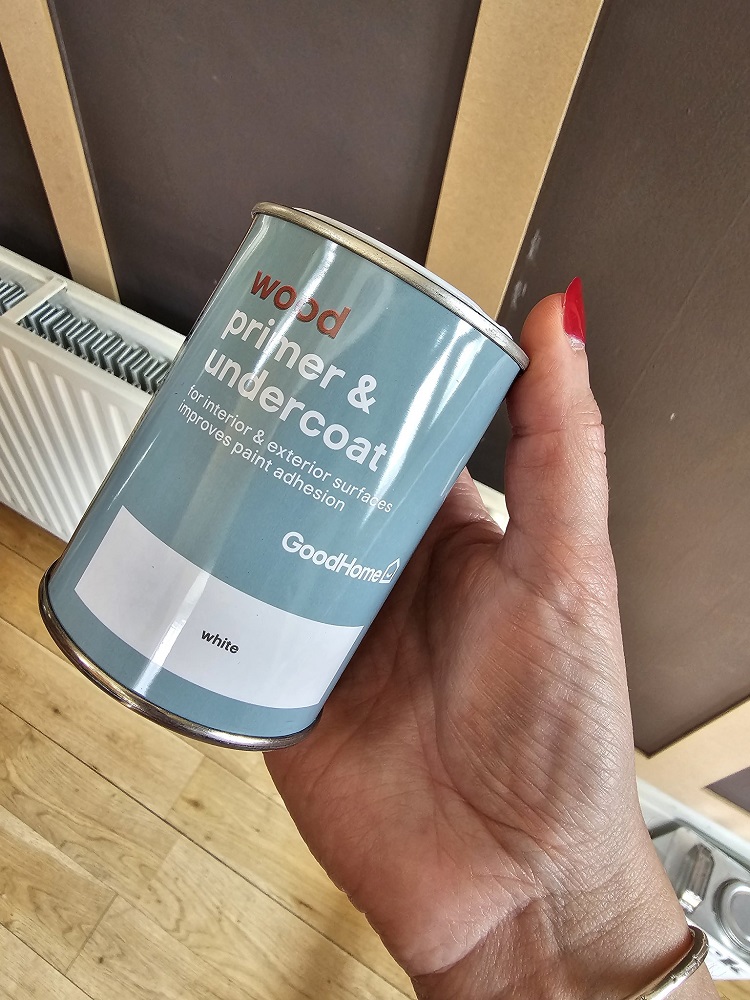
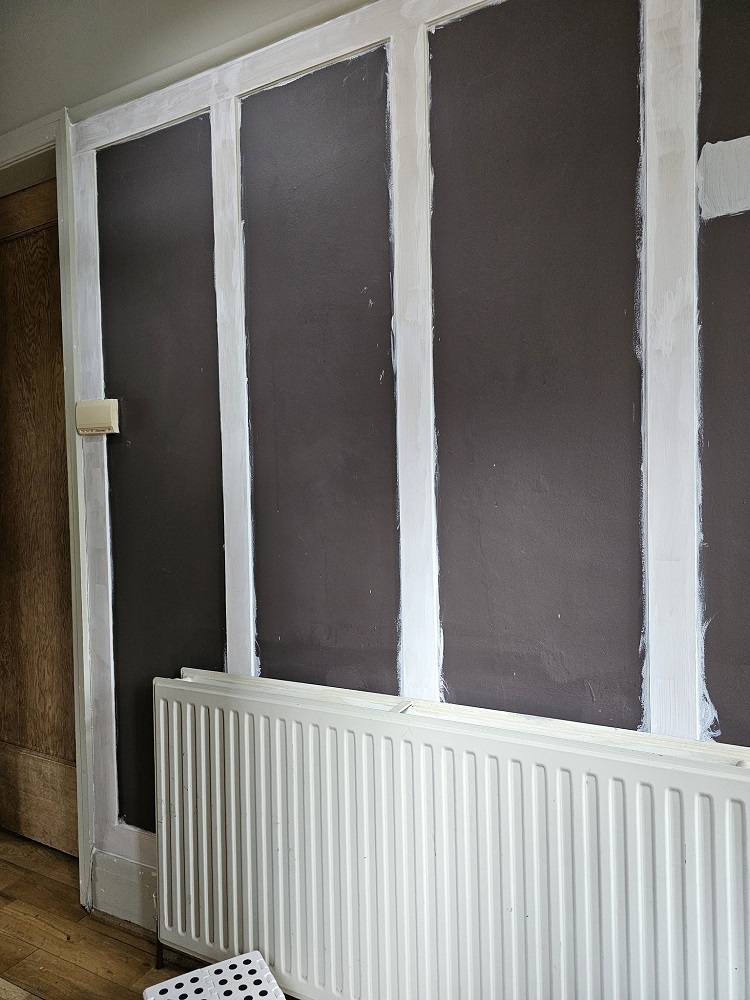
- Apply a coat of primer to the MDF strips and let it dry completely.
Step 4: Caulking and Smoothing
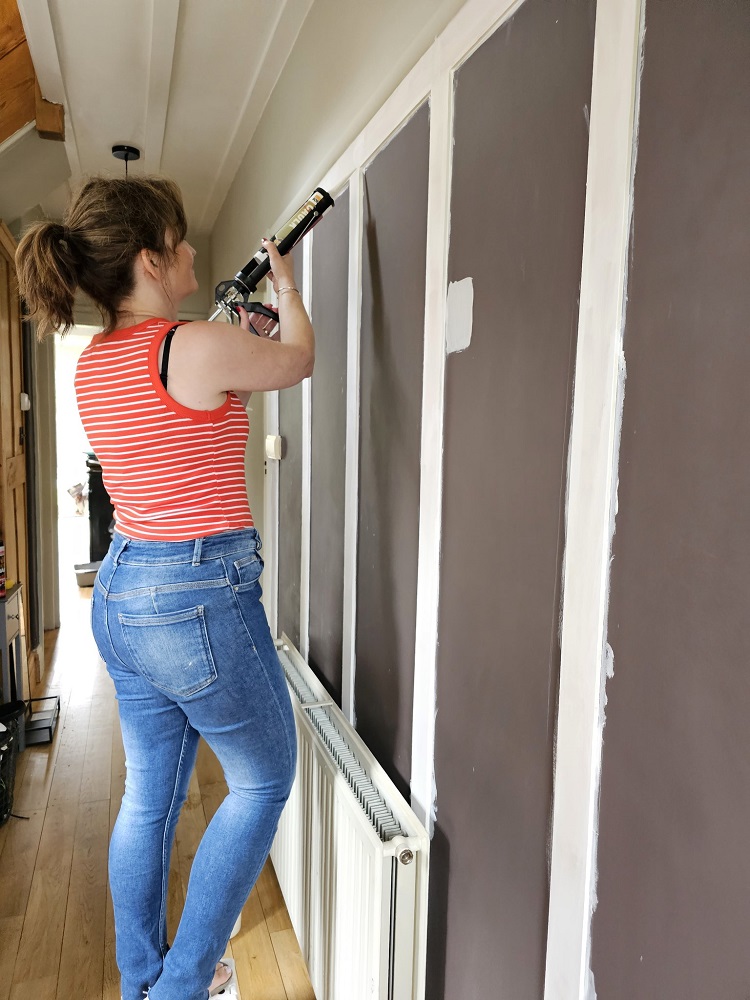
- Fill in the gaps between the MDF strips with caulk to create a seamless appearance.
- Smooth the caulk with your finger (dip first in warm water) or a caulk-smoothing tool.
- Allow the caulk to dry according to the manufacturer’s instructions.
- Sand the edges of the MDF strips and any rough areas to achieve a smooth surface.
Step 5: Painting
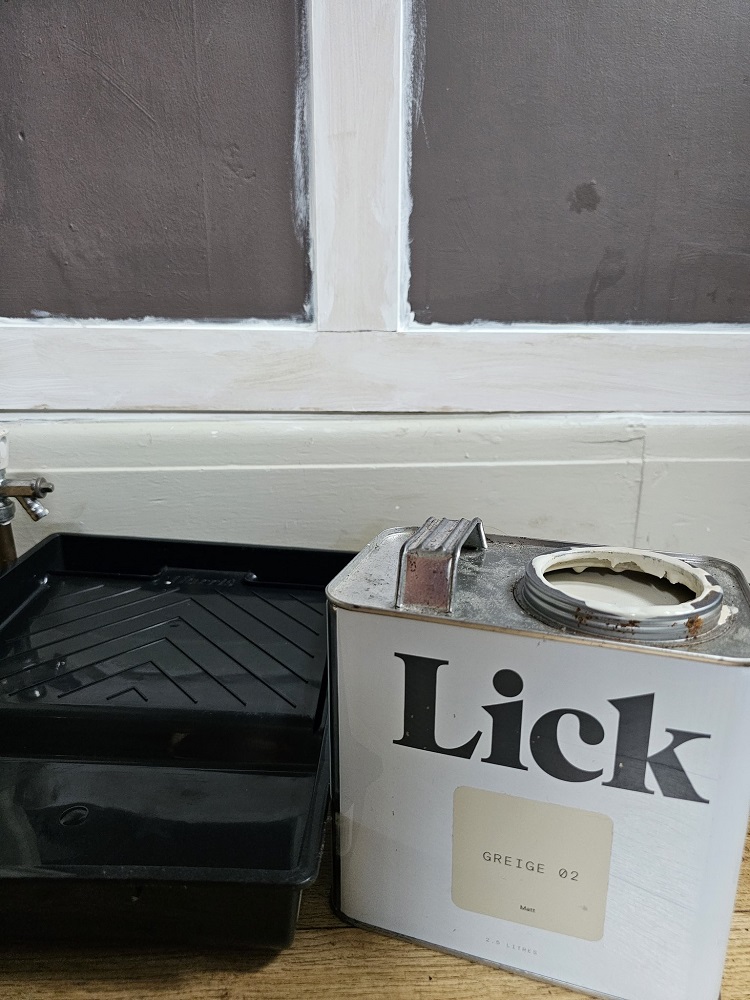
- Once the caulk is set (after 4 hours but ideally leave 24 hours) apply your chosen paint colour. Use a paintbrush for the edges and a roller for the larger surfaces. I used Greige 02 from Lick paint.
- Apply a second, allowing proper drying time between coats.
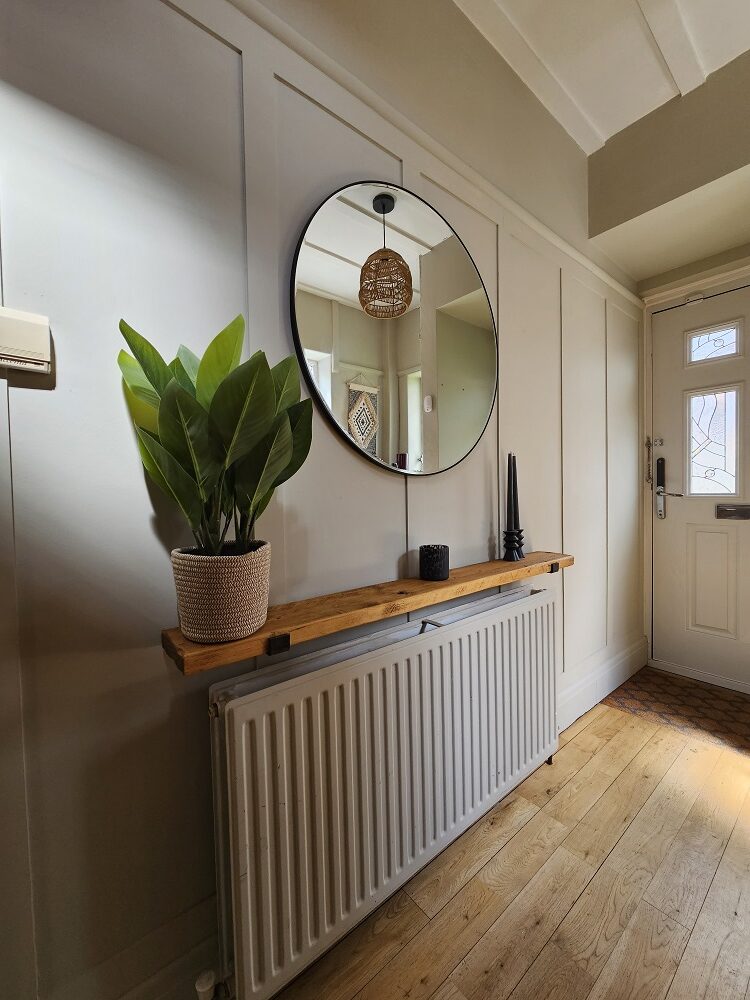
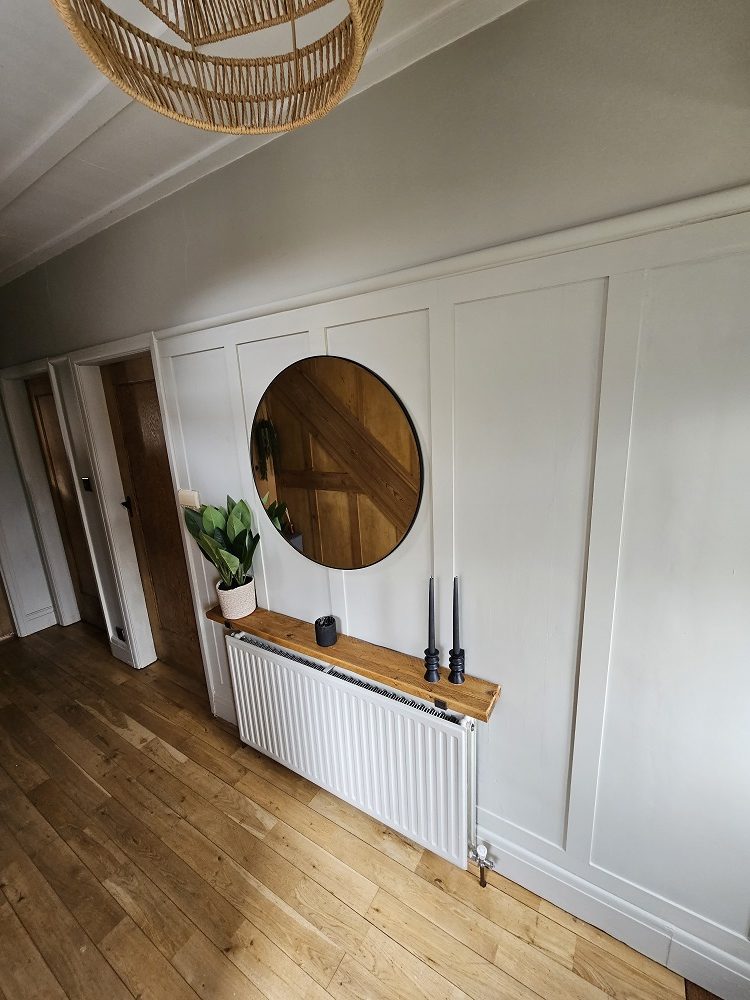
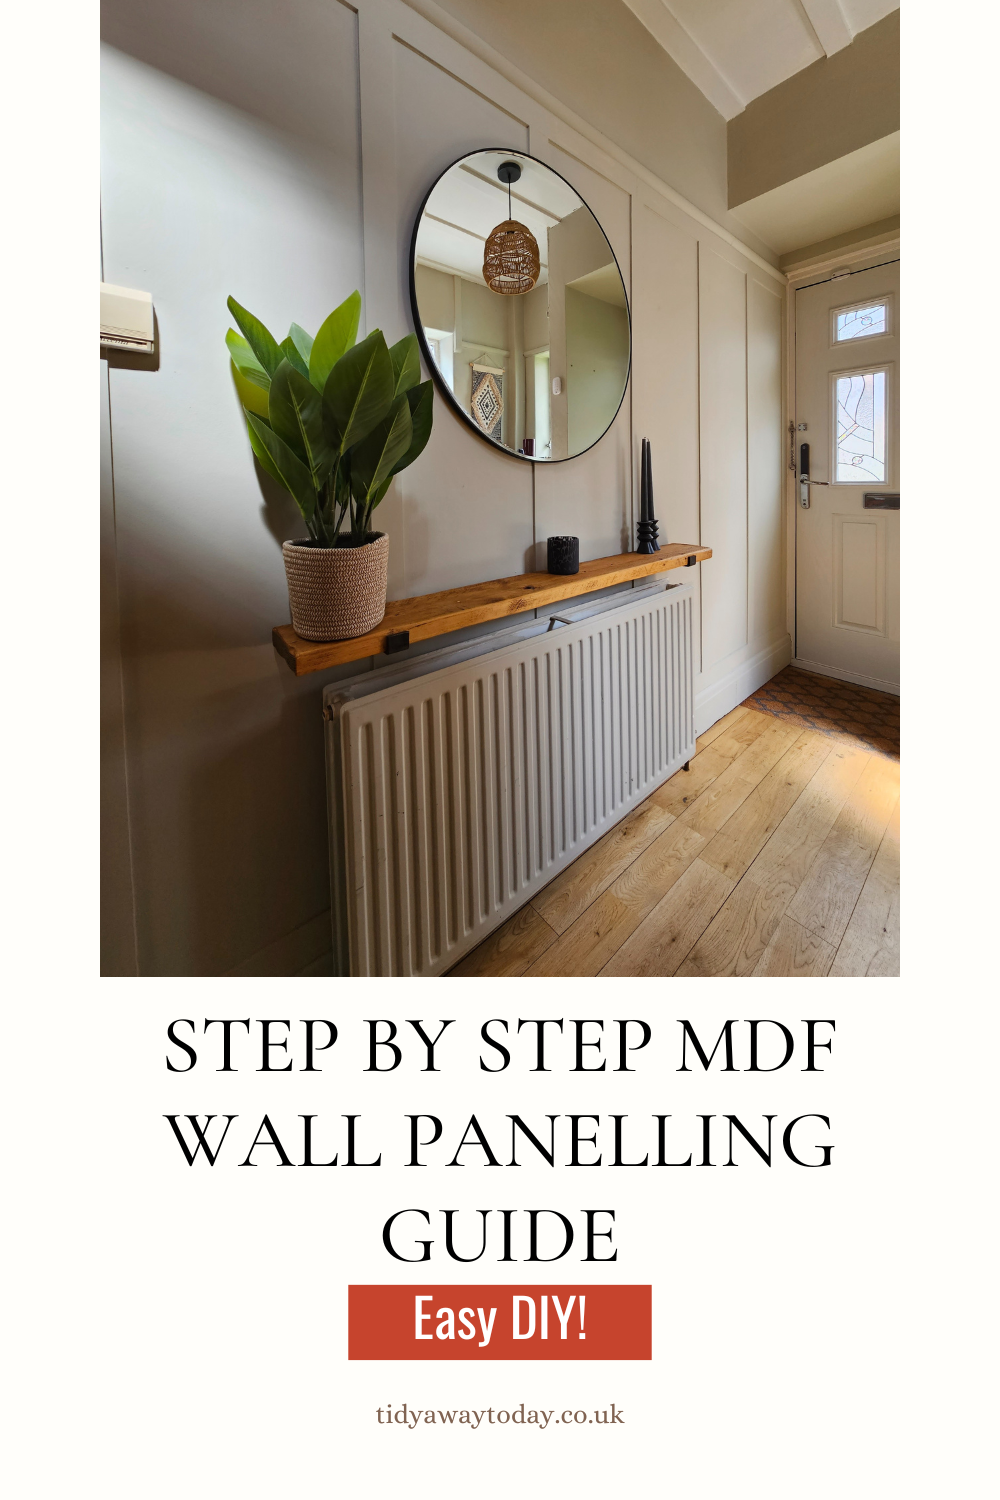
Step 6: Installing the Mirror and Shelf
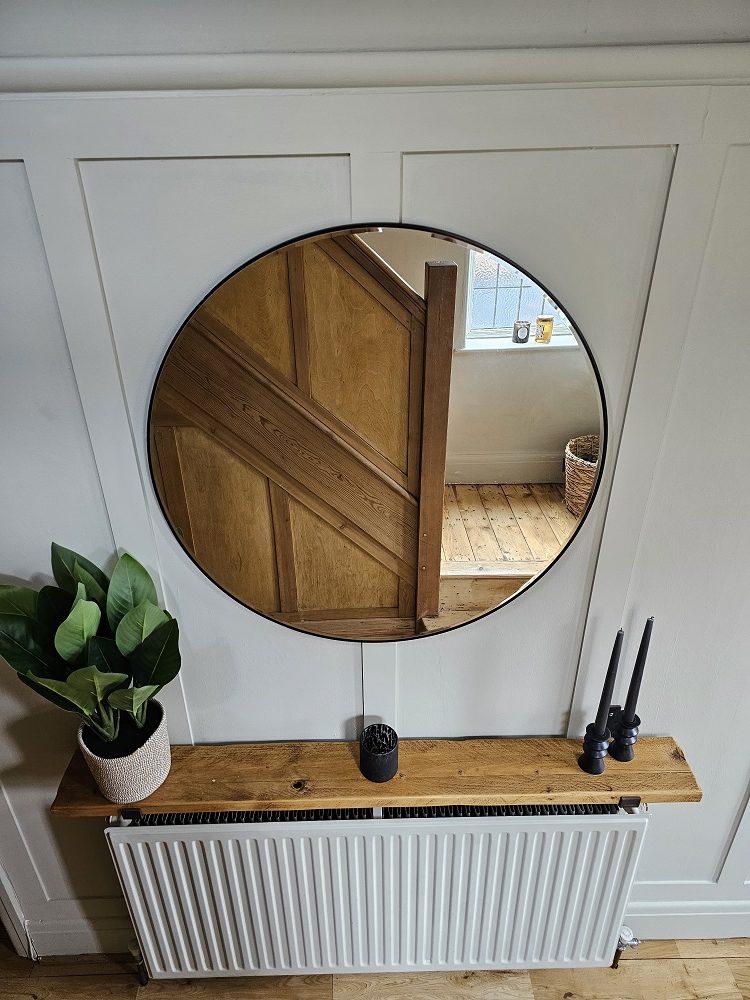
- Our mirror is this one from Dunelm. Install the necessary hanging hardware on the back of the mirror shelf according to the manufacturer’s instructions.
- Measure and mark the desired height for the mirror on the wall. Hang securely – we used two drill holes and rawl plugs.
- If you are opting for a radiator shelf like mine, again hang it securely using long screws and rawl plugs in the wall and make sure it’s level.
Step 7: Adding Decorative Elements
- Place indoor plants in decorative pots on the shelf. Choose plants that thrive in indoor conditions and complement your hallway’s aesthetic. Or cheat like me and add a fake plant!
- You can also add small decorative items like candles, framed photos, or small sculptures to personalize the space further.
Step 8: Final Touches
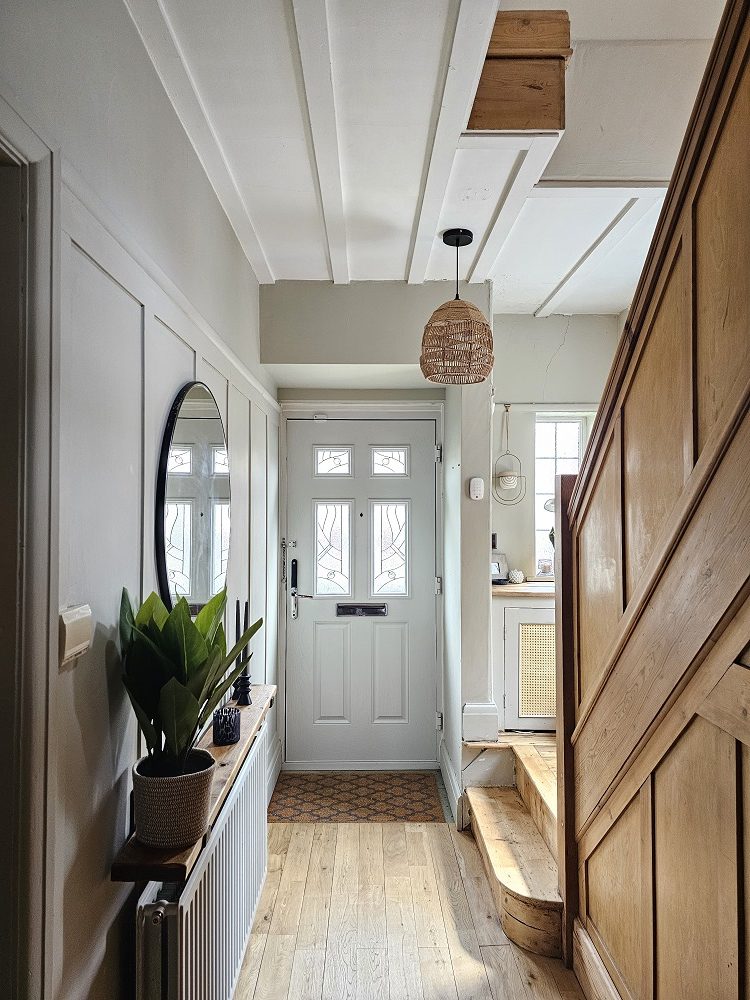
Stand back and admire your beautifully panelled hallway! The combination of the sleek MDF panels, the stylish mirror and vibrant greenery will transform your hallway into a welcoming and stylish space that’s sure to leave a lasting impression on anyone who enters your home.
Conclusion
Creating a stylish panelled wall in your hallway using pre-cut MDF strips is a fantastic way to add personality and elegance to your home. With careful planning, precise installation, and thoughtful decoration, you’ll turn a once-ordinary hallway into a stunning focal point that reflects your unique style. So roll up your sleeves, gather your materials, and embark on this rewarding DIY journey to elevate your space. Or why not pin this post for later!
Also if you enjoyed this project, why not check out my other simple wall panelling project here.